Allocate more disk space to VM in Proxmox
This post will go trough the necessary steps to allocate/resize more disk space to a Virtual Machine in Proxmox.
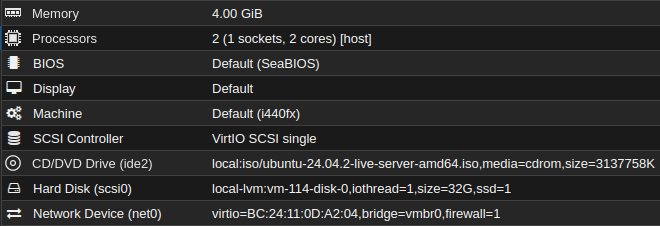
I'm running Proxmox 8.3.5 and my Virtual Machine OS is Ubuntu Server 24.04.2.
As shown below, my Ubuntu Server is equipped with a 32GB disk and I'm going to double it in size.
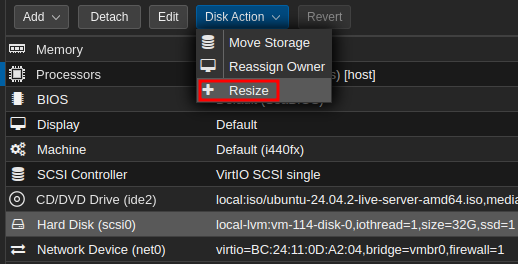
To resize it is fairly simple, click on the Hard Disk and then click on:
Disk Action-> Resize
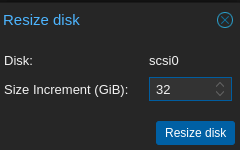
Here you enter how much in GiB you want to increment the disk.
Not the total.
Click Resize disk (This action can be done with the vm still on)
Verify that the disk is the right size

It is time to apply the changes on the vm.
Connect to it either trough the console in Proxmox or connect with SSH.
It is recommended to switch to sudo since all commands requires root priviliges.
sudo su
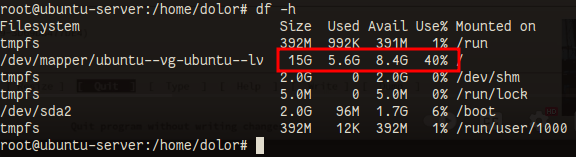
Lets check the disk space with df
df -h
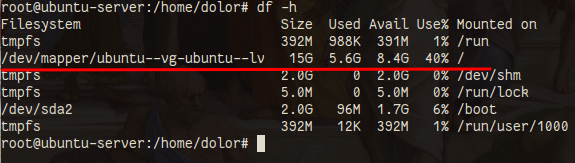
This machine was installed with the default settings on the installer. So even tough the disk is 32GB in size, the OS is installed under the logical volume /dev/mapper/ubuntu--vg-ubuntu--lv that is 15GB in size. Oh well, lets go ahead and extend it now.
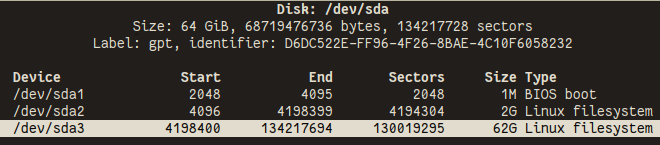
Run lsblk in order to find the name of the drive
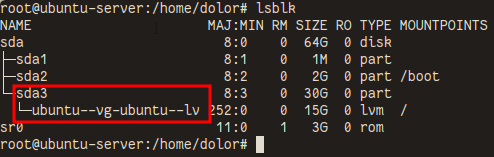
Ubuntu Server is installed on sda3
Run cfdisk
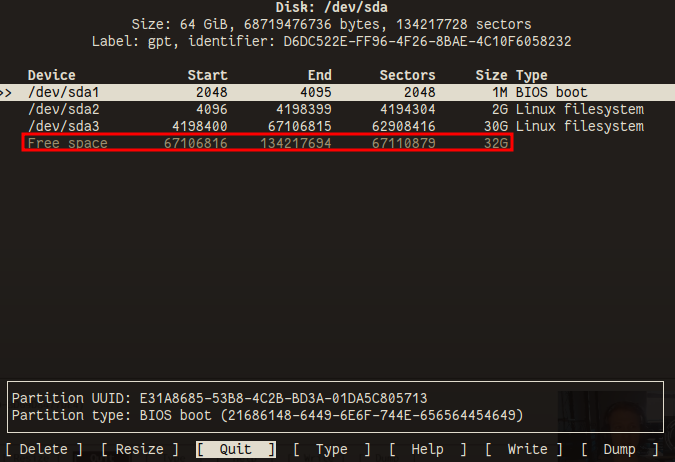
In here we notice the Free space since we extended the disk in Proxmox. But we are not going to select it here. Instead we want to choose the /dev/sda3 since thats where Ubuntu Server is installed.
Select /dev/sda3 and choose the option Resize
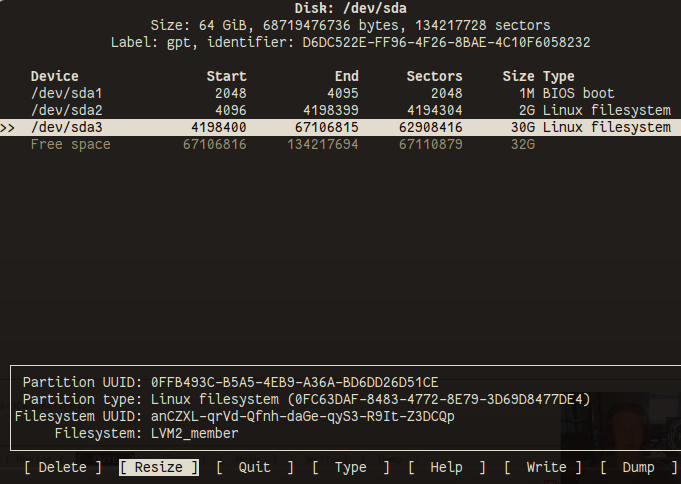
Cfdisk detects the amount of free space, you can choose something smaller here, but not larger. We want all available space, so press Enter
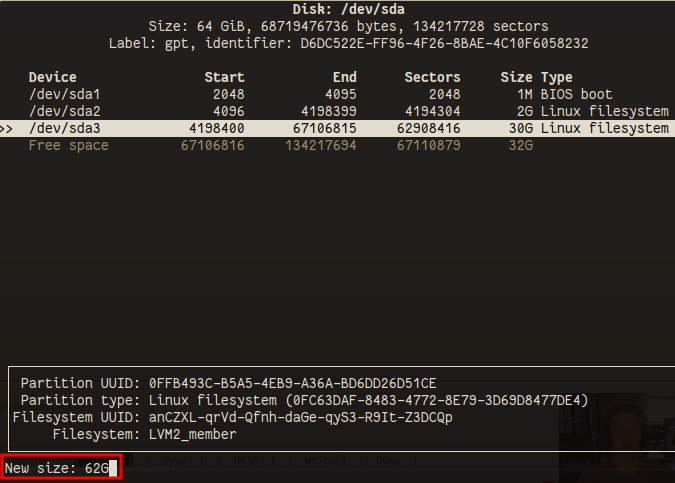
Look at that! Now /dev/sda3 is 62GB in size. Click on Write then Quit in cfdisk and go and check df
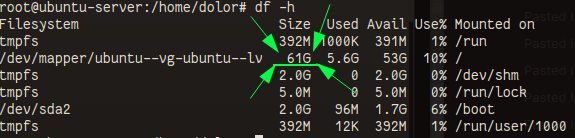
Hmm, does not look like it, seems to still be the same size. What the heck?
Lets check lsblk again to investigate.
So we wan't that the volumegroup and logical volume ubuntu--vg-ubuntu--lv that lives under sda3 to be extended.
The reason we don't see any changes is because we really havent resized anything yet. We have just prepared the disk for the actual resizing.
For that we run the pvresize command:
pvresize /dev/sda3

Nice, 1 physical volume has been resized. Looks like we are getting somewhere.
But we are not done yet, if you check df -h again you will still see that the disk is its original size.
In order to finalize this change we need to extend the logical volume.
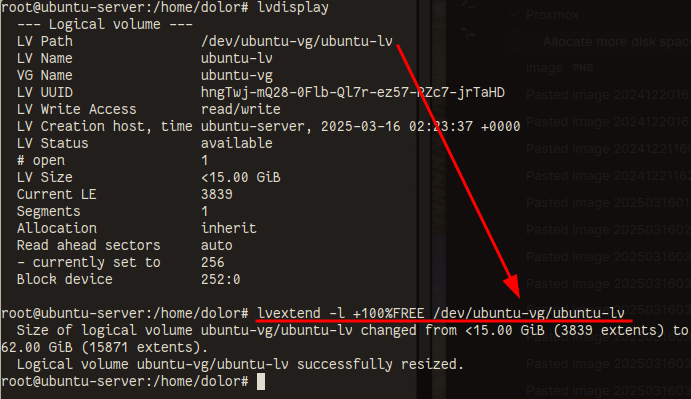
Run lvdisplay
So I'm going to run trough this last part quickly since time is precious.
Lvdisplay shows us the logical volumes path, we are going to need it.
Run the following command:
lvextend -l 100%FREE /dev/ubuntu-vg/ubuntu-lv
Last step is to resize the root partition that is shown in df -h
Run the following command:
resize2fs /dev/mapper/ubuntu--vg-ubuntu--lv
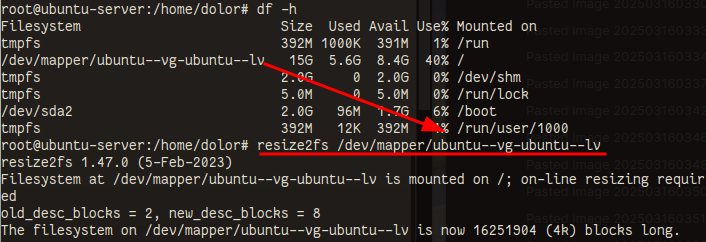
Check df -h one last time
And there you have it!
Don't be stupid now and always be careful and read the output from the commands and system. If you don't know what one specific command does read the man pages.